
My current non-app related project has taken me out into the back yard, but brought along my coding and technical experience. Given this site’s name, the project might be called the atomic birdhouse.
For the past couple of years I’ve had a bird house in my yard, in which black-capped chickadees have nested and raised chicks. I’d see them come and go, and sometimes hear sounds from inside the house.

The sounds got me wondering what It looked like in there. I didn’t want to disturb the birds, so I only found what they left behind after moving out at the end of the season. This year I decided to take a closer look. I was going to put a camera in the bird house.
The Goal
My initial idea was simply, how can I see what’s going on in there? I refined that until I decided I wanted
- Ability to take photos and/or videos, scheduled or on demand
- Photos and videos should be remotely available by some convenient means
- Stand-alone power so I wouldn’t need to run a power cable
- Software setup should be remotely configurable, since I expected some trial and error
- Reliable enough to operate for several months without me pissing off any birds by invading the house while they were using it.
Camera Hardware
A Raspberry Pi Zero W with the companion camera module is the core of my setup. There are other ways to do this, of course. The Pi is nice for me because I knew I could log in to it remotely to change the software setup on the fly, if needed. Built-in support for the camera module is also very convenient.
I went with the basic Pi camera module, not the newer “high quality” camera. Partly for cost, but mostly because space in the bird house is limited and I needed something small. Whatever the differences in picture quality, there’s no way the larger camera could physically fit the space available.
Seeing in the semi-dark
How much light Is there in a bird house? I don’t know. There’s one small round opening, so probably, not a lot? Fortunately the Pi camera comes in a version that’s sensitive to IR light, for better night vision. That’s what I got.
Even so, what if there’s not enough IR for the camera? Since this is a Raspberry Pi, I can do something about that. The camera support includes the option to fire a flash, which you wire up yourself using GPIO pins. The GPIO can be a trigger for a flash, or if the flash is small enough, it can power it directly. I didn’t need a big flash, so I soldered an IR LED and a resistor to a couple of GPIO pins as the flash.
Focus! Focus!
Did I mention that there’s not a lot of space in the bird house? I might have mentioned it. It’s small enough that, out of the box, a Raspberry Pi camera in the house can’t focus on something inside it. Fortunately there’s a tool to fix that– for 95 cents, a lens adjustment tool. Would it be enough? I’d have to give it a shot and see.
Anything else?
That’s enough to get things working, aside from the question of power. If you can run a USB cable to your birdhouse, you’re set there. I set mine up for grid-free solar powered operation, which I’ll describe in a follow up post.
I also added one of the pink and white Pi Zero cases to house the Pi and the camera. Partly because it’s a convenient way to mount the camera, and partly because it would provide a little protection from inquisitive wildlife.
Installing all of this required a little surgery on the bird house. My bird house was assembled with easily accessible screws, so I removed part of the roof for easy access. Velcro tape secured the Pi assembly to the inside top of the bird house.

The photo above shows some of the power management stuff I mentioned, which I’l get into in another post.
Testing
Some advance testing was critical, since I couldn’t mess with the hardware once it was in place. Fortunately I have a chickadee Christmas ornament that’s almost exactly life size. Also, from cleaning the house in previous years, I had an idea of how much nesting material the birds would use. I set up some test shots and adjusted the focus and the flash until they looked good.

I tweaked the flash angle a little bit more but otherwise kept it like this. In this shot the padding on the bottom was bright white, so the flash is more reflective than it will be with a real nest.
Parts List
I ordered all of this from Adafruit. Going over the list, I used
- Raspberry Pi Zero W NoIR camera pack, which covers the Pi, the camera, and the case. The “NoIR” here is a little confusing. It means “no IR filter”. that is, it can see IR light. Yeah, the IR-sensitive camera is called the “NoIR” camera.
- Lens adjustment tool for the camera
- Super-bright IR LED
- …and a resistor in series with the LED. I forgot to write down the value, and I can’t check because the bird house is currently occupied. A few tens of kΩ, as I recall.
Follow-up posts
There’s obviously more to this. The solar power setup I mentioned, for example, and of course the software that makes it all run. I’ll cover that in follow-up posts.
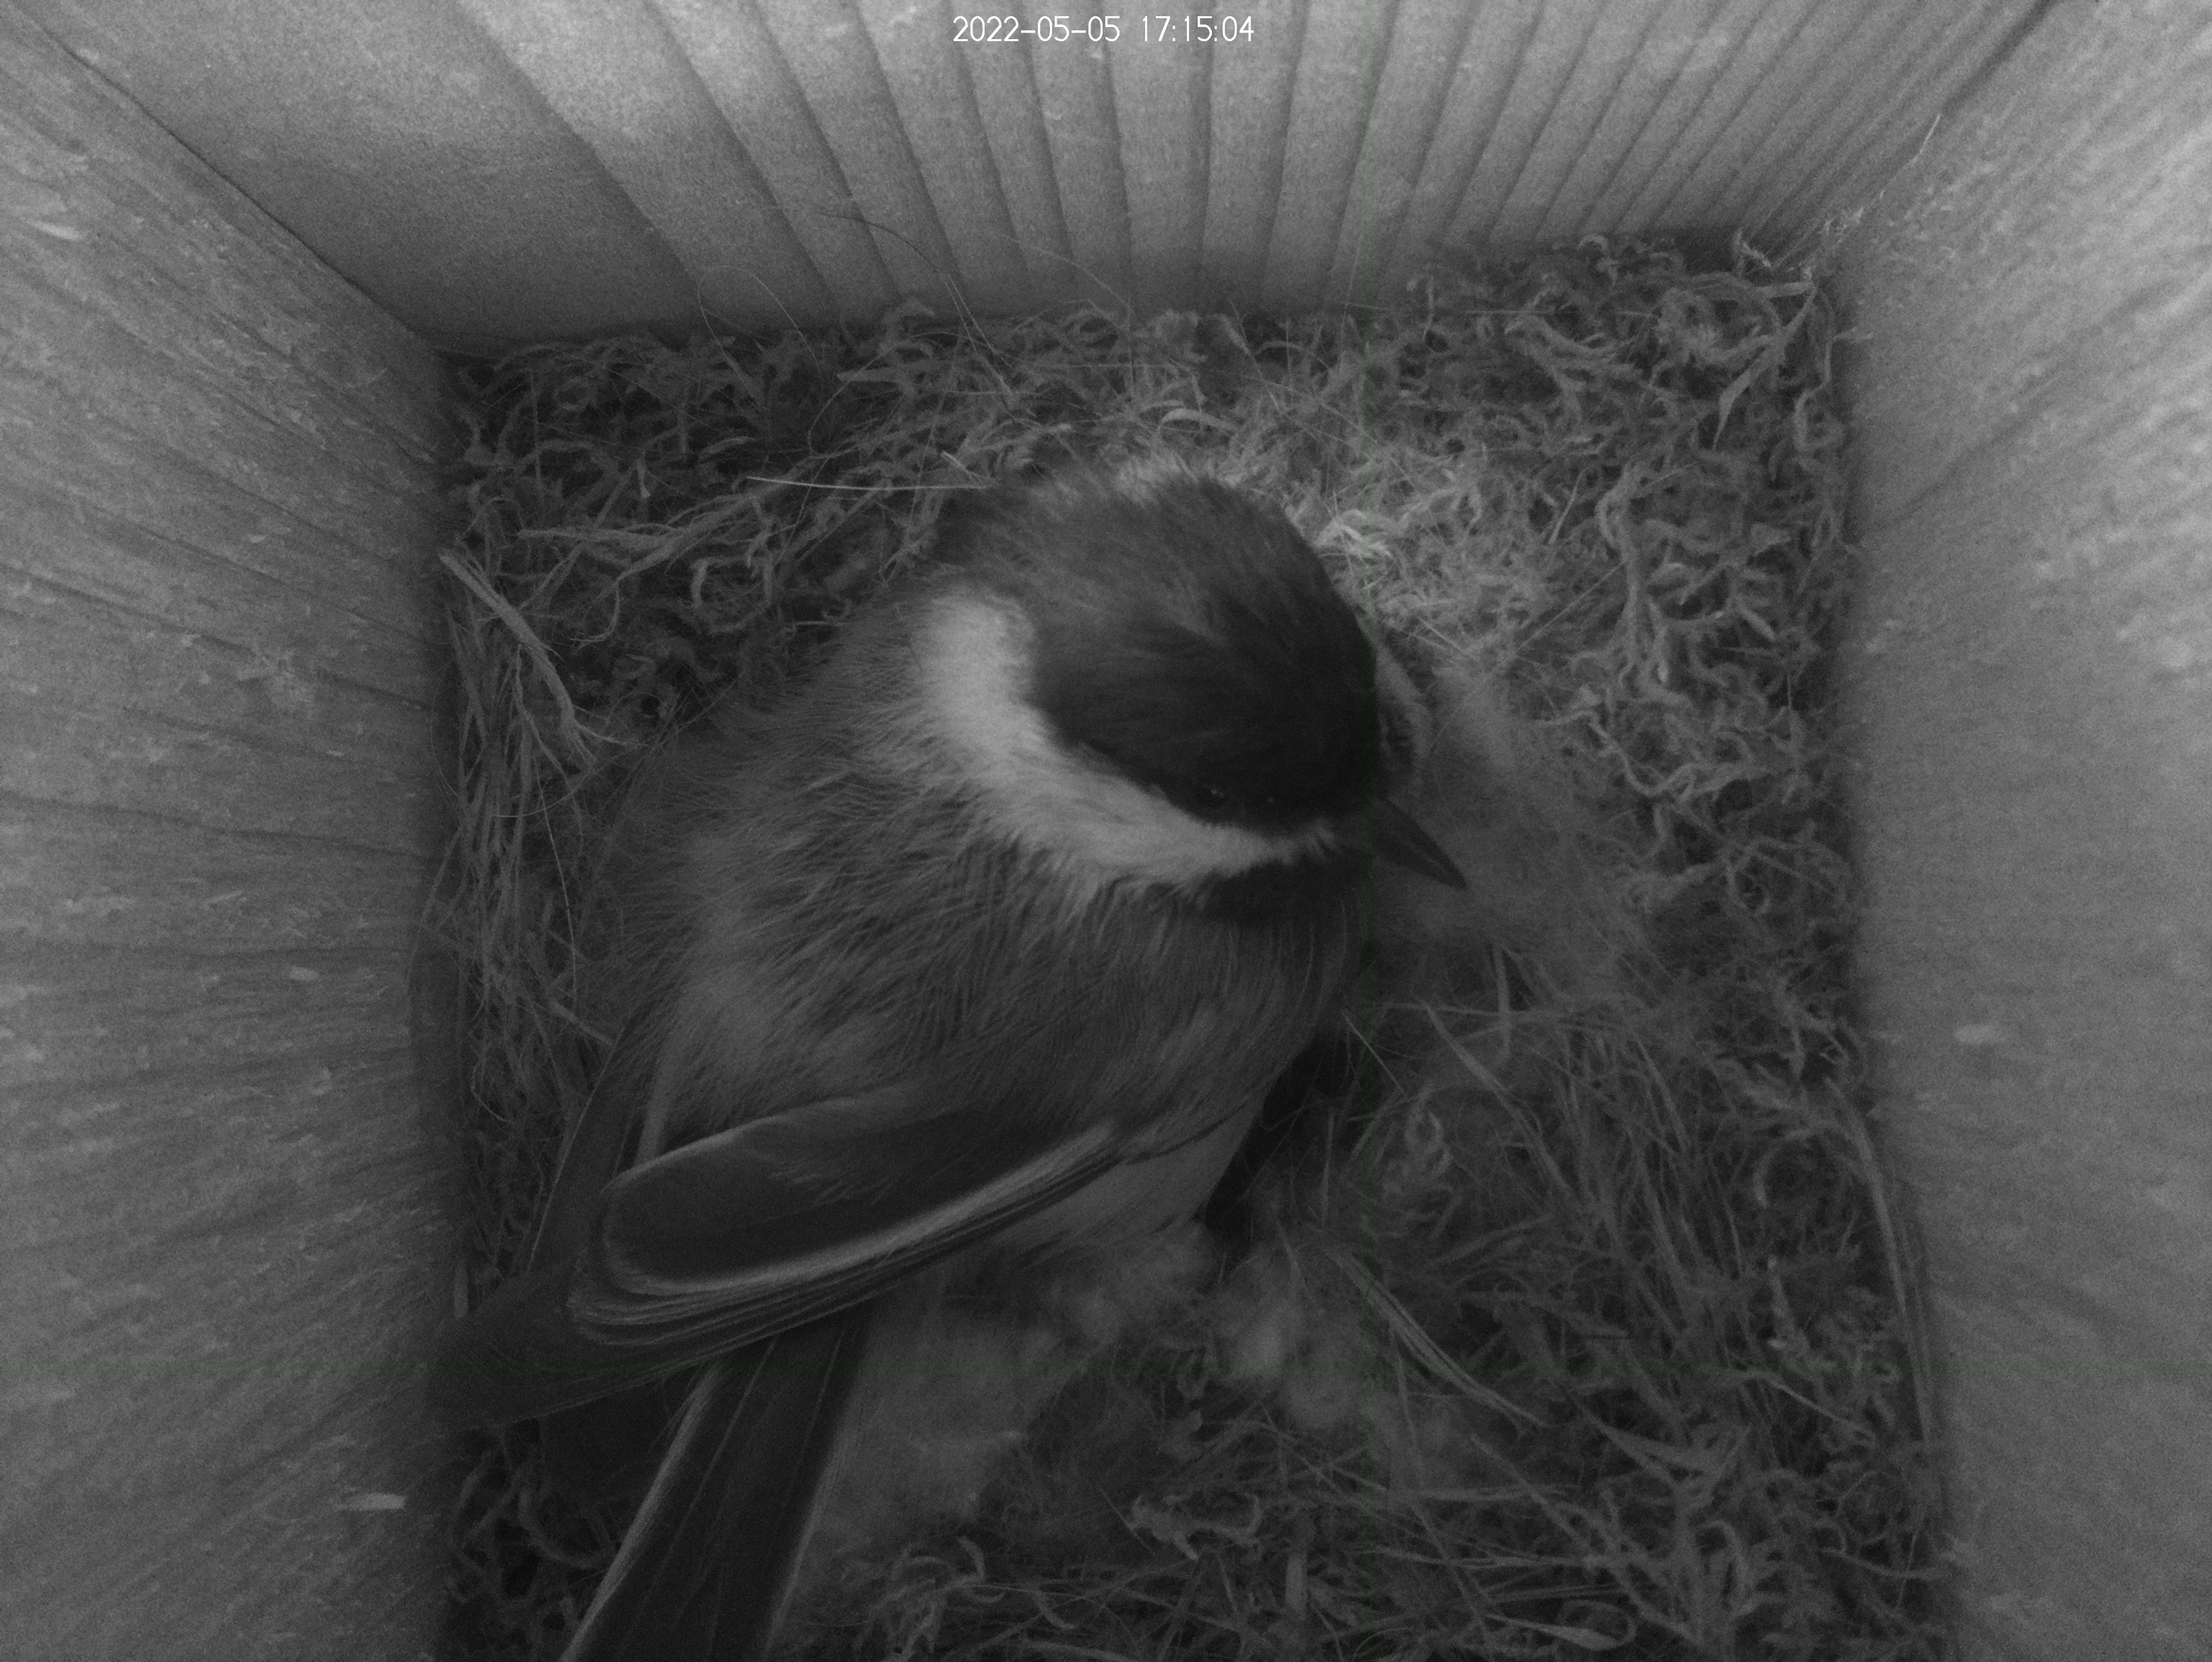
In the meantime, here’s a teaser of how it’s going so far.
Post a Comment